
Part 3: The bricks
Steps 10 to 12. One brick, then a whole wall with Make a grid, then a play that shows why rules are needed.
What this part teaches
You never have to add forty bricks one by one. NutHouse copies an object into rows and columns for you. And every copy shares the same name and settings, so a rule about “Brick” is about all forty of them. Then you play, and see that objects do nothing clever until you give them rules.
Step 10: Add a brick
- Press + Add object.
- Click Bricks & Blocks, then Brick.
- Drag it near the top-left of the level.
Top-left matters. The grid grows down and to the right from the brick you start with.
Step 11: Build a wall
- Click the brick.
- Press Make grid… on the right.
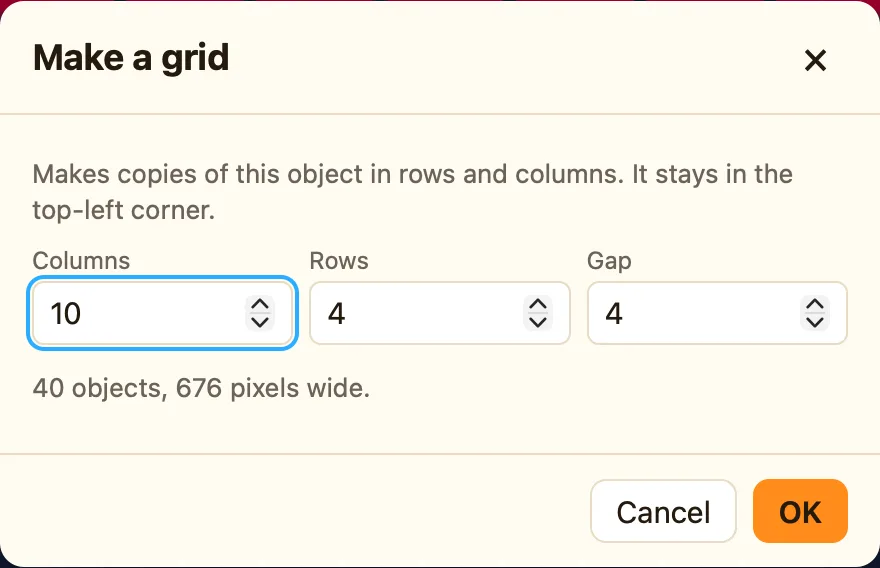
- Choose 10 columns and 4 rows, and press OK.
The dialog tells you as you type: “40 objects” and how many pixels wide. If the wall goes off the edge, press ⌘Z, move the brick further left and try again.
| Columns | How many across. The tutorial uses 10. |
|---|---|
| Rows | How many down. The tutorial uses 4. |
| Gap | Pixels between bricks. Leave it at 4. |
Step 12: What happens now?
Press ▶ Play level. The ball flies straight through every brick and off the screen. Press Esc when you have seen it.
This step is the point of the whole part. The bricks are there. The ball is there. But nothing told NutHouse what should happen when they meet. That is what a rule is for, and Part 4 writes your first one.
Next: Part 4: Your first rule.
